

support@yourcompany.com) through Plain, you need to add two DNS records to your domain. This is a required step before you can enable the email channel. It ensures your messages are authenticated and reliably reach your customers’ inboxes.
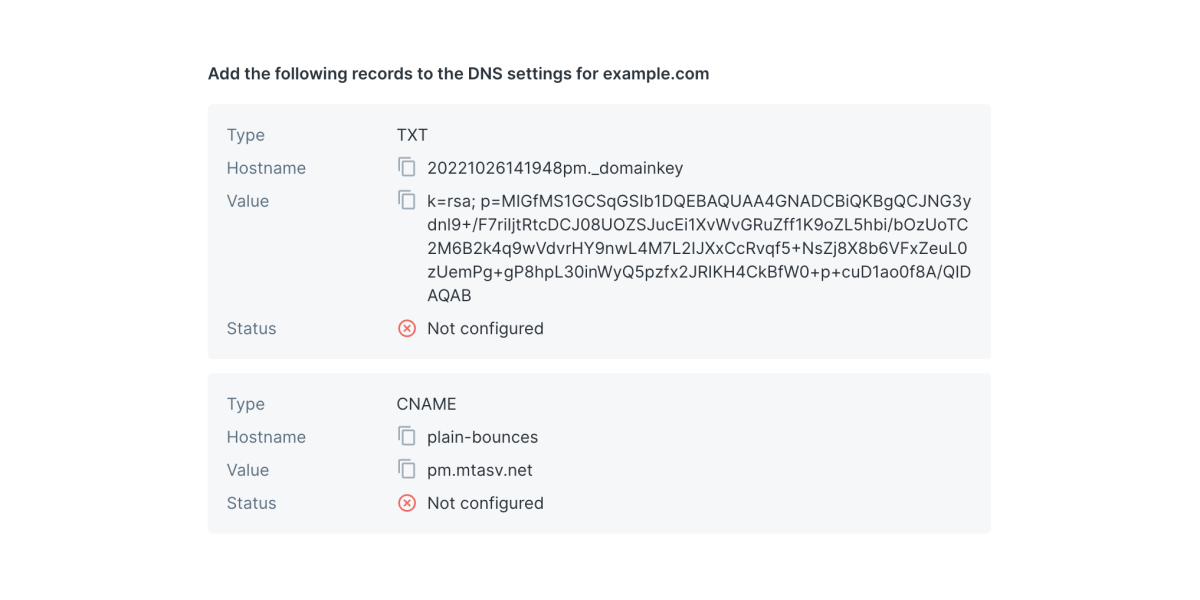
Step 1: Get your DNS record values from Plain
Go to Settings → Channels → Email in your Plain workspace. Plain shows two DNS records for you to copy:- A TXT record: enables DKIM, which cryptographically authenticates your emails
- A CNAME record: passes SPF checks
Step 2: Add the records to your DNS provider
Follow the guide for your provider. The field names vary slightly, but you’re always adding the same two records.DNSimple
- Go to dnsimple.com/dashboard
- Choose your domain → click DNS → Manage
- Add a TXT Record: Name = Hostname value from Plain, Content = Value from Plain
- Add a CNAME Record: Name = Hostname value from Plain, Content = Value from Plain
Namecheap
- Go to namecheap.com/domains/list
- Select your domain → click Manage → Advanced DNS
- Add a TXT Record: Host = Hostname value from Plain, Value = Value from Plain
- Add a CNAME Record: Host = Hostname value from Plain, Value = Value from Plain
- Click Save all changes
GoDaddy
- Go to account.godaddy.com/products
- Select your domain → click DNS
- Add a TXT Record: Name = Hostname value from Plain, Content = Value from Plain
- Add a CNAME Record: Name = Hostname value from Plain, Content = Value from Plain
- Confirm and save
Cloudflare
- Go to dash.cloudflare.com and select your domain
- Click DNS → Records → Add record
- Add a TXT Record: Name = Hostname value from Plain, Content = Value from Plain
- Add a CNAME Record: Name = Hostname value from Plain, Target = Value from Plain
- Set Proxy status to DNS only (grey cloud) on the CNAME record. Proxied mode will break email authentication
- Save both records
AWS route 53
- Open the Route 53 console and select your hosted zone
- Click Create record
- Add a TXT Record: Record name = Hostname value from Plain, Value = Value from Plain
- Add a CNAME Record: Record name = Hostname value from Plain, Value = Value from Plain
- Save changes
About email deliverability
We don’t ask you to modify your SPF record directly. Instead, the CNAME record you add resolves through Postmark’s infrastructure, which handles SPF automatically. When a receiving mail server processes an email sent from Plain, it:- Verifies the DKIM signature using the TXT record
-
Verifies SPF by checking the
Return-Pathheader, which resolves to Postmark’s authorized sending IPs - Checks DMARC alignment when your domain requires it
-all, some providers may reject emails from Plain. Fix this by adding include:spf.mtasv.net to your existing SPF TXT record.
If you require DMARC strict alignment, where the Return-Path domain must exactly match the From domain, get in touch and we can discuss options.